CI/CD with Behaviour Driven Development (BDD)
Thu Mar 03 202218 min read
Goal
The aim of this white paper is to demonstrate automated CI/CD with BDD and TDD.
We will try to replicate GitHub User Search as our product feature
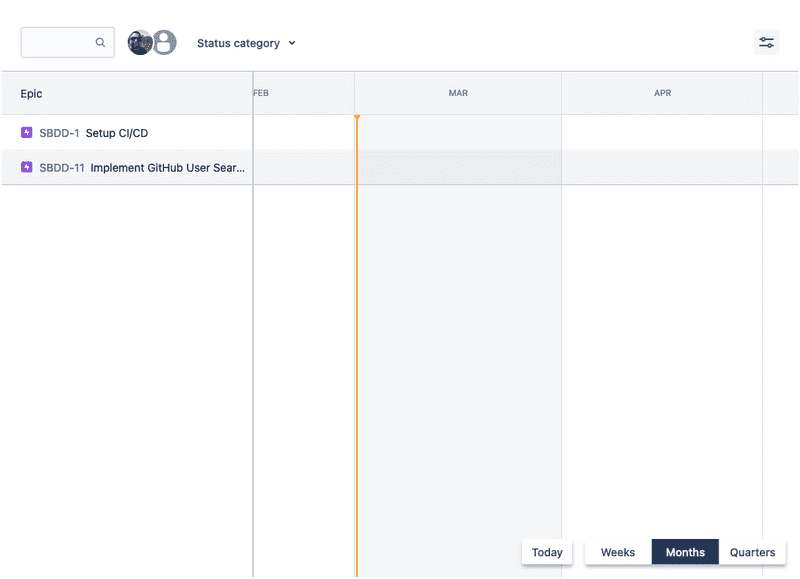
We will use Jira as our Project Management Tool.
Preparing for Development
Before we can adopt BDD and TDD and be fully agile, it is very important that we have the right infrastructure in place. Jira helps us take care of the project management part of it.
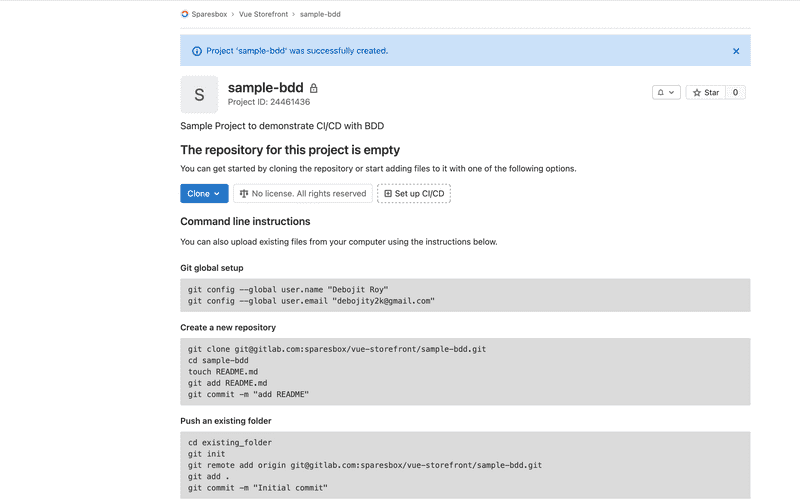
For the technical aspect we will leverage GitLab as our git provider, CI Runner and CD agent.
Setup Base Project
The Next step is to set up the base project for development. To keep things simple we will use Create React App to bootstrap our project. We will use TypeScript as the template.
As we will deploying our Infrastructure as Code (IAC), we would like to keep both app and infra code next to each other. Separate your app code under webapp.
cd sample-bdd
create-react-app webapp --template typescript
cd webapp
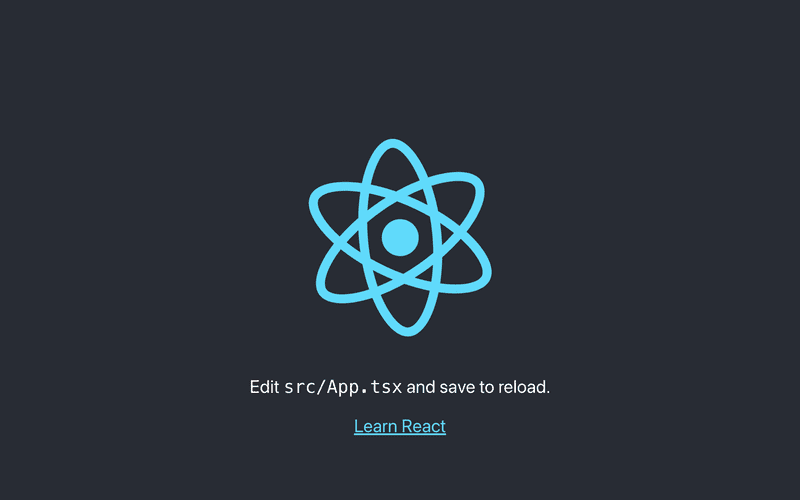
If everything is set up, on running yarn dev you should see the sample page.
Push your code to GitLab.
Setup GitLab CI
The Next step is to set up GitLab CI. As part of this step, we would like to keep it simple.
Add .gitlab-ci.yml to the root of your project.
Add these few lines to make sure Pipelines are working.
build-job:
  stage: build
  script:
    - echo "Hello, $GITLAB_USER_LOGIN!"
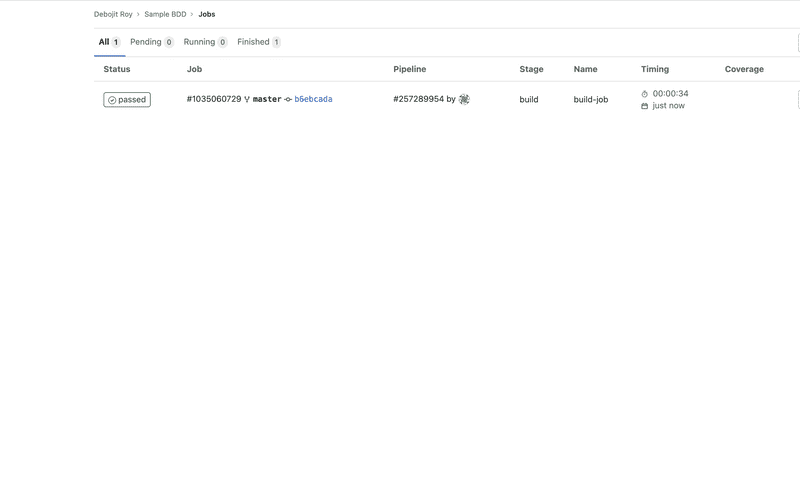
If everything goes well, you should see the job running successfully on code push.
Setup Unit Test Pipeline
The Next step is to set up build and unit tests pipeline. We will use Node 14 Docker image for our pipeline.
Now our .gitlab-ci.yml should look like
default:
  image: mhart/alpine-node:14

build-job:
  stage: build
  script:
    - cd webapp
    - yarn
    - yarn build

unit-test:
  stage: test
  script:
    - cd webapp
    - yarn
    - yarn test:ci
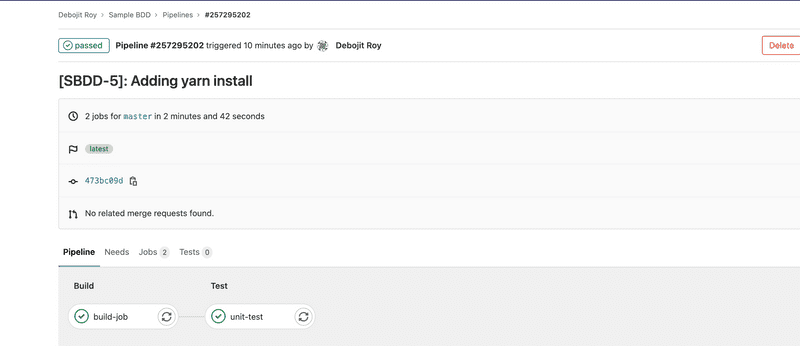
And after pushing, it should run the pipeline.
Setting up Integration Tests Pipeline
The next step is to set up Integration Tests. We will use Cypress for running our Integration tests.
Setting up Integration Test Project
mkdir integration
cd integration
yarn init
Setting up Cypress
yarn add cypress --dev
This will add cypress to the project.
Now to set up the cypress folders, we need to launch cypress. Add a script in package.json to open cypress.
yarn cypress:open
This will set up all required files. Delete the examples folder under integration
Setting up your first Integration Test and adding to pipeline
Now we can add sample.spec.js to open the webapp endpoint and make sure it is available.
We will add some additional scripts to make sure we can run Cypress in CI mode.
"scripts": {
    "cypress:open": "cypress open",
    "cypress:run": "cypress run",
    "serve:webapp": "serve -l 3000 -s ../webapp/build",
    "run:integration:ci": "start-server-and-test serve:webapp http-get://localhost:3000 cypress:run"
  },
Also, we will now make sure our build step saves the artifact, and we can pick it up in while running our integration tests.
Our .gitlab-ci.yml should look like this now,
default:
  image: cypress/browsers:node14.15.0-chrome86-ff82

build-job:
  stage: build
  script:
    - cd webapp
    - yarn
    - yarn build
  artifacts:
    paths:
    - webapp/build/**/*
    expire_in: 1 week


unit-test:
  stage: test
  script:
    - cd webapp
    - yarn
    - yarn test:ci

integration-test:
  stage: test
  script:
    - cd integration
    - yarn
    - yarn run:integration:ci
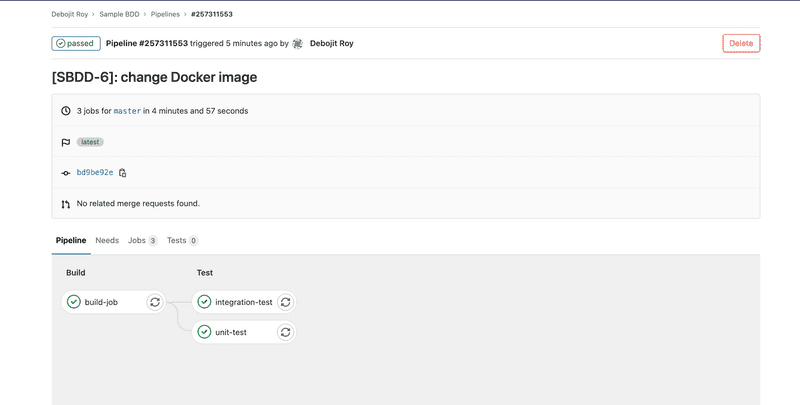
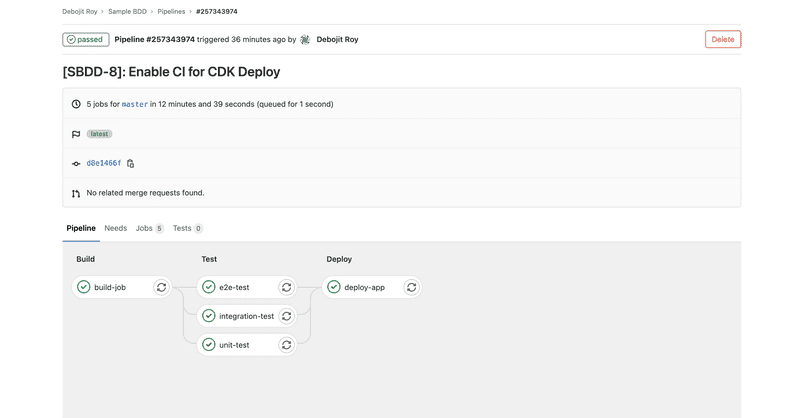
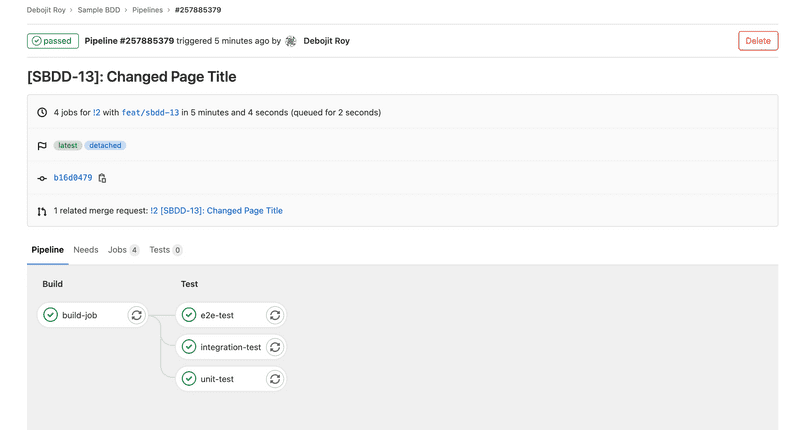
After, pushing code, we should see our pipeline running Build and tests
Setup E2E Test Pipeline
The Next step is to set up E2E Tests for the project. We can create both Integration and E2E under the same project, but it is better to separate the projects as most probably different teams will be working on each of them (Developers on Integration and QA on E2E)
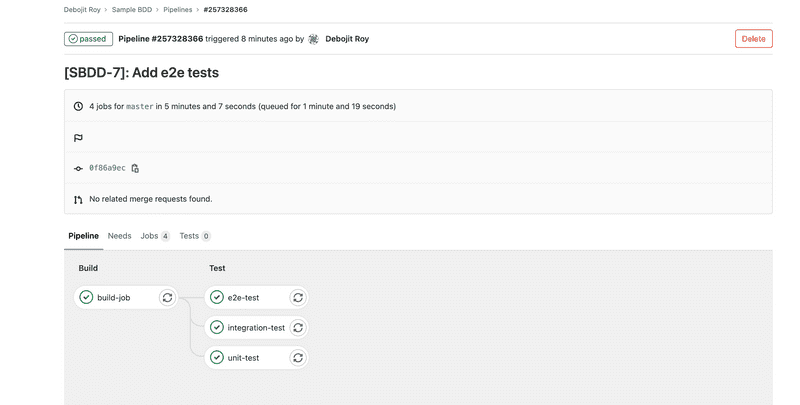
The setup process is the same, except the naming. At the end of it we should see Test Step running all the three pipelines.
Setup Infra Project and Automate Infra Provision on Pipeline
Now we have our application building, unit tests running, integration and e2e tests in place. Now we would like to automate our deployment.
We would like to automate our Infrastructure creation as well so that we can deploy anywhere !!!
Setting up infra
First install aws-cdk globally
yarn global add aws-cdk
Now let’s create the project and set up the project.
mkdir infra
cd infra
cdk init app --language typescript
Adding Deployment Stack
As we are building a static site, the best and easiest way to host it on Amazon S3 fronted by Cloudfront.
We want the S3 bucket to be private and only allow users to reach our site through Cloudfront.
To start our stack, create lib/infra-service.ts
- Create our
Bucket
// Prepare Web App Deployment bucket
    const webAppBucket = new Bucket(this, 'sample-bdd-webapp', {
      blockPublicAccess: BlockPublicAccess.BLOCK_ALL,
      removalPolicy: core.RemovalPolicy.DESTROY,
      autoDeleteObjects: true,
      websiteIndexDocument: 'index.html',
    });

new core.CfnOutput(this, '_WebApp-Bucket_', { value: webAppBucket.bucketName });- Create
Cloudfront Origin Access Identity, which will be used to access S3
// Prepare Web App Cloudfront OAI
    const webAppOAI = new OriginAccessIdentity(this, 'webapp-oai', {
      comment: 'WebApp OAI'
    });

    // Allow read to Web App Cloudfront OAI
webAppBucket.grantRead(webAppOAI);- Prepare your Cloudfront Distro
// Prepare Web App Cloudfront distro
    const webAppDistro = new CloudFrontWebDistribution(this, 'web-app-cf-distro', {
      originConfigs: [{
        behaviors: [{ isDefaultBehavior: true }],
        s3OriginSource: {
          s3BucketSource: webAppBucket,
          originAccessIdentity: webAppOAI,
        },
      }],
      errorConfigurations: [{
        errorCode: 404,
        responseCode: 200,
        responsePagePath: '/index.html'
      }],
    });

    new core.CfnOutput(this, '_WebApp-Distro-Id_', { value: webAppDistro.distributionId });
new core.CfnOutput(this, '_WepApp-Distro-Domain-Name_', { value: webAppDistro.distributionDomainName });- And upload your content to S3 Bucket
// Deploy Web App Build Contents
    new BucketDeployment(this, 'WebAppOtherFiles', {
      sources: [Source.asset('../webapp/build/', { exclude: ['index.html'] })],
      destinationBucket: webAppBucket,
      cacheControl: [CacheControl.fromString('max-age=31536000,public,immutable')],
      prune: false,
    });

    new BucketDeployment(this, 'WebAppIndexFile', {
      sources: [Source.asset('../webapp/build/', { exclude: ['*', '!index.html'] })],
      destinationBucket: webAppBucket,
      cacheControl: [CacheControl.fromString('max-age=0,no-cache,no-store,must-revalidate')],
      prune: false,
      distribution: webAppDistro, // Invalidate the Cloudfront Cache
      distributionPaths: ['/*'],
});- Initialise your stack in the construct
new GithubSearchSampleInfraService(this, 'SampleBDDApp');Adding AWS Credentials to your Pipeline Variables
Before we add the command to automate our infrastructure deployment, we need to add AWS credentials to the pipeline.
CI/CD
Adding Deployment details to pipeline
Finally, we can add the deployment to our .gitlab-ci.yml
deploy-app:
  stage: deploy
  script:
    - cd infra
    - yarn global add aws-cdk
    - yarn
    - cdk synth
    - cdk bootstrap
    - cdk deploy --ci --require-approval never
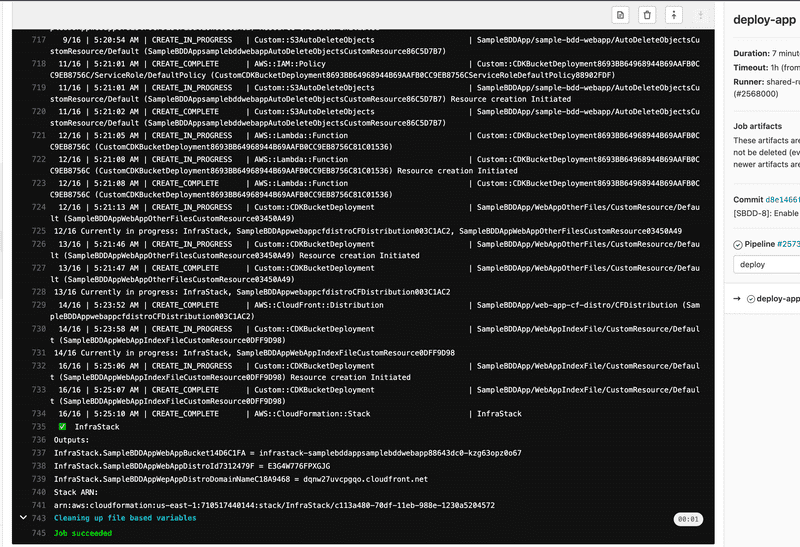
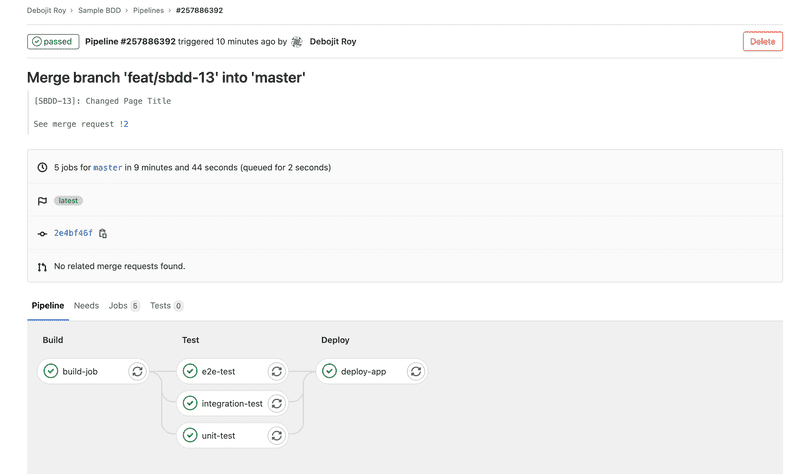
After pushing code to GitLab, we should see our deployment running successfully
In the console we can see the deployment url
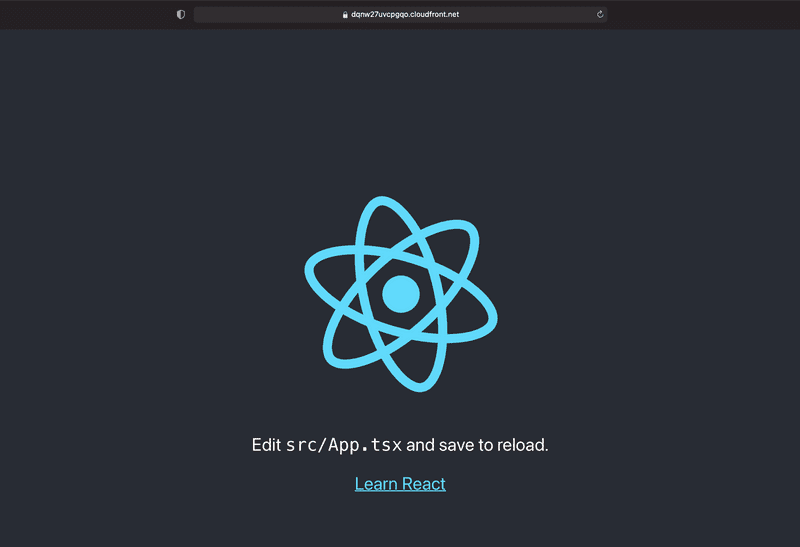
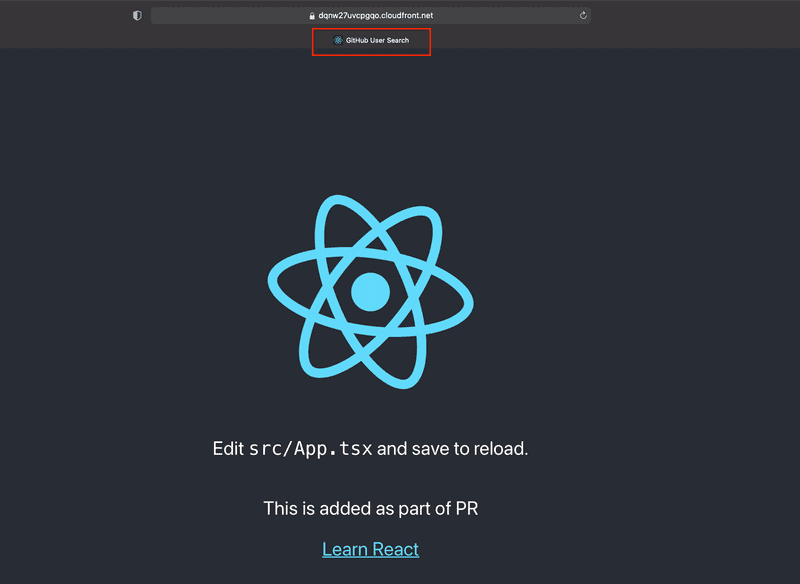
Yayyy !!! We can see our app on browser now.
We are slowly reaching there now
Continuous Deploy project on Merge Request
Now the final part of the requirement is to make sure 2 things happen
- Pipeline is only run when a Merge Request is created or updated
- MR should run build and tests, but NO Deployments
- When the merge requests are merged into master, deployments should happen
So we need to add additional conditions to our .gitlab-ci.yml
Which will look like this
default:
  image: cypress/browsers:node14.15.0-chrome86-ff82

.only-default: &only-default
  only:
    - master
    - merge_requests
    - tags

build-job:
  <<: *only-default
  stage: build
  script:
    - cd webapp
    - yarn
    - yarn build
  artifacts:
    paths:
    - webapp/build/**/*
    expire_in: 1 week


unit-test:
  <<: *only-default
  stage: test
  script:
    - cd webapp
    - yarn
    - yarn test:ci
  artifacts:
    paths:
    - webapp/build/**/*
    expire_in: 1 week

integration-test:
  <<: *only-default
  stage: test
  script:
    - cd integration
    - yarn
    - yarn run:integration:ci
  artifacts:
    paths:
    - cypress/videos/**/*
    expire_in: 1 week

e2e-test:
  <<: *only-default
  stage: test
  script:
    - cd e2e
    - yarn
    - yarn run:e2e:ci
  artifacts:
    paths:
    - cypress/videos/**/*
    expire_in: 1 week

deploy-app:
  stage: deploy
  script:
    - cd infra
    - yarn global add aws-cdk
    - yarn
    - cdk synth
    - cdk bootstrap
    - cdk deploy --ci --require-approval never
  only:
    - master
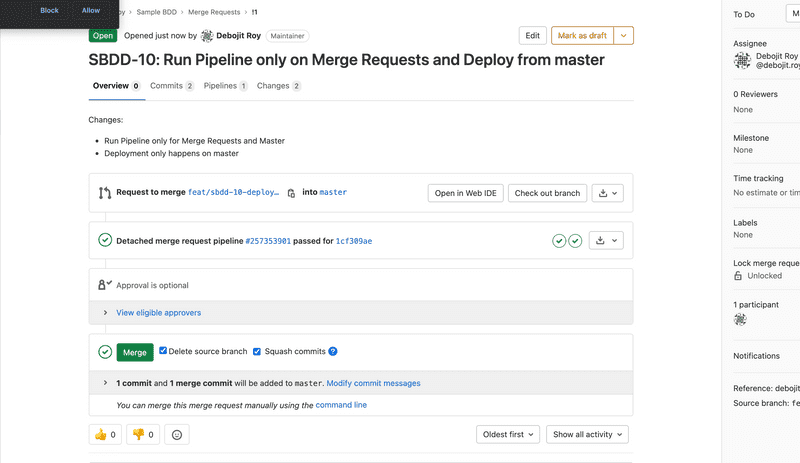
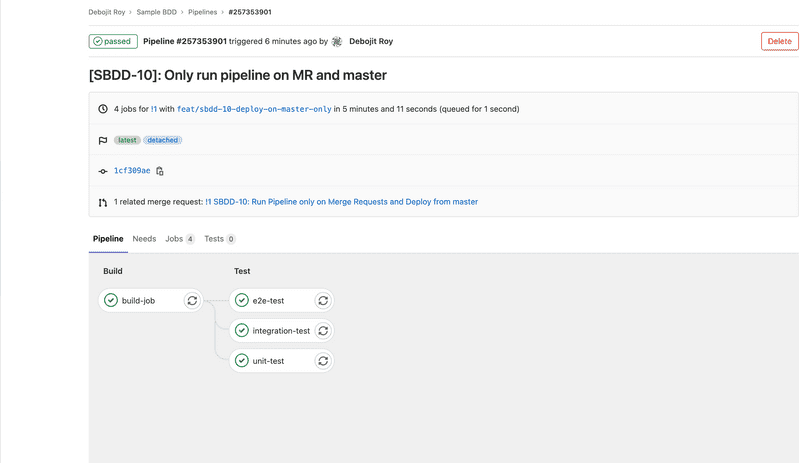
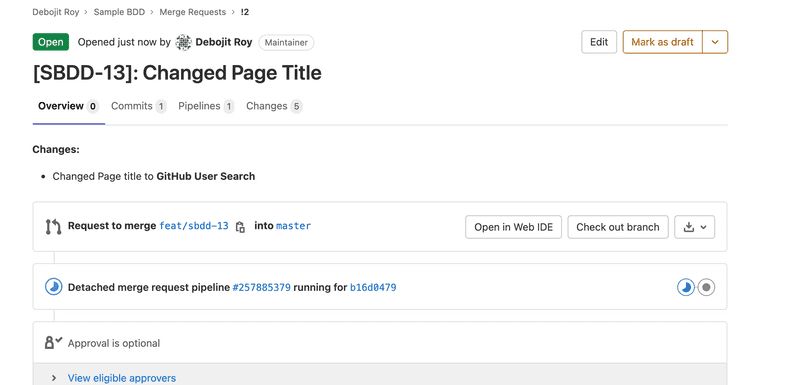
Now when the MR is raised
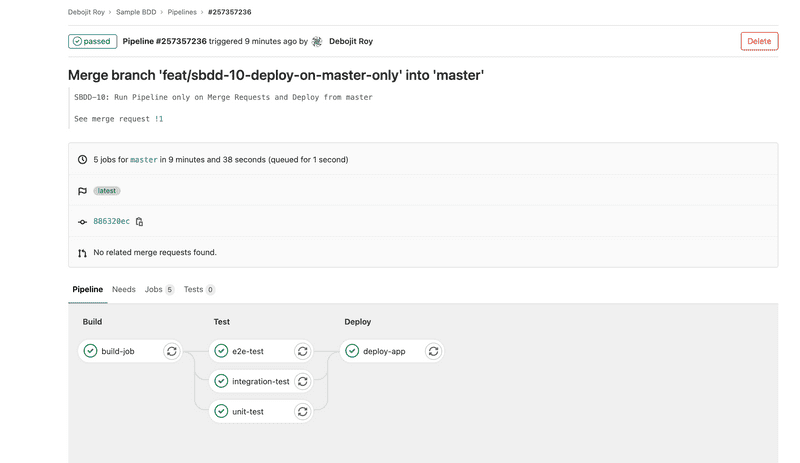
When the Merge Request is merged, Deployment happens on master
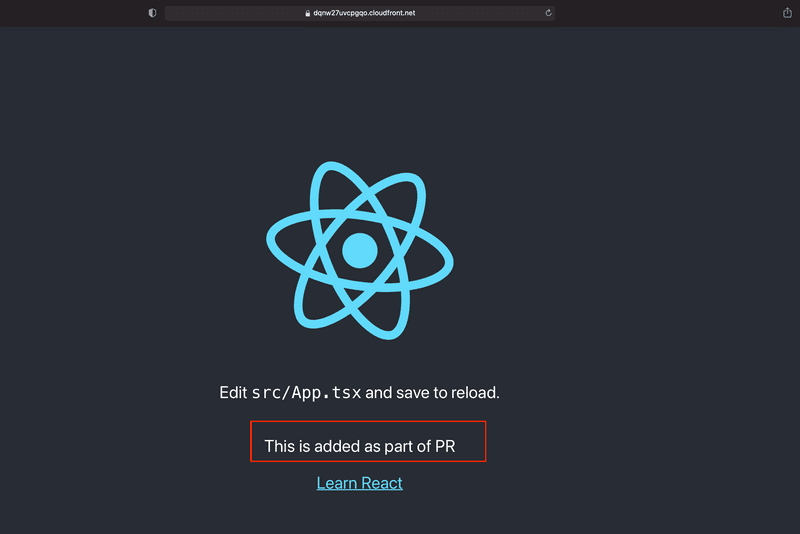
Now if we refresh our website, we should see our changes
Sweet now our CI/CD is all setup. We are good to start feature development !!!
Feature Development
First Story
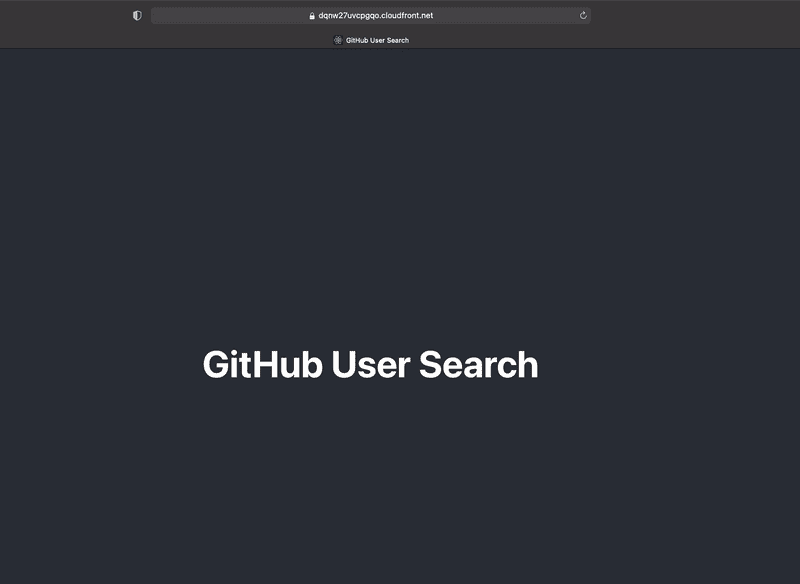
So our first story will be to show correct Page Title and Heading
Now, using the BDD approach we would like to define the behaviour.
Feature: Page Headings
User should see the correct Page Headings
Breaking it down into behaviours
Behaviour 1: Page Title should be - GitHub User Search
Given a user lands on the home page
Then the Browser Page Title should be - GitHub User Search
Behaviour 2: Page Main Heading should be - GitHub User Search
Given that a user lands on the home page
Then the page Top Heading should be - GitHub User Search
And the tag should be h1
How do we define the behaviours
There is no set rules for defining behaviours. It is more up to the team to figure out what works for them.
They can be as granular as these or could be broad as well.
But the whole point of doing BDD is to make our application ready for TDD (Test Driven Development)
The better the scenarios are written, the better are the tests. The goal is to make sure we have captured all scenarios (including corner cases) upfront, so that when we develop software we know exactly what our software is expected to do.
With our first 2 scenarios in place, lets start coding :slight_smile:
Starting TDD
Writing Failing E2E Tests
Once we have broken down the story into BDD scenarios, the first step is to write failing tests. There are 2 approaches on how to do this, which we will discuss later. For this illustration, we expect developers are maintaining both E2E and Integration tests.
So we start with creating a new spec user.search.spec.js
Now, the best part of BDD, your test cases are already written !!!
So our first scenario looks like
describe('Github User Search', () => {
  it('A user lands on the home page', () => {
    cy.visit('http://localhost:3000')
  })

  it('the Browser Page Title should be - GitHub User Search', () => {
    cy.title().should('eq', 'GitHub User Search')
  })
})
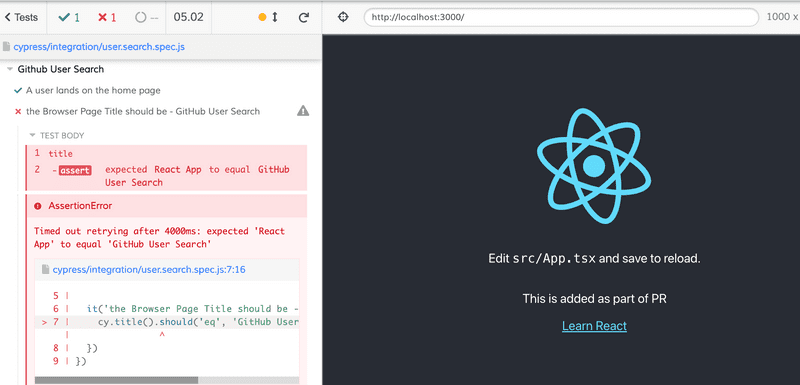
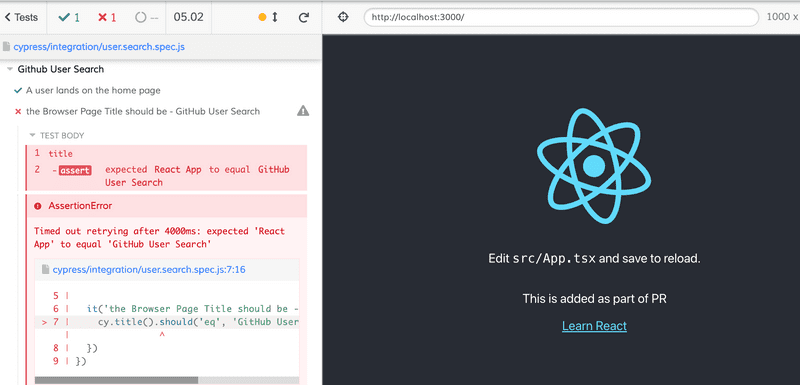
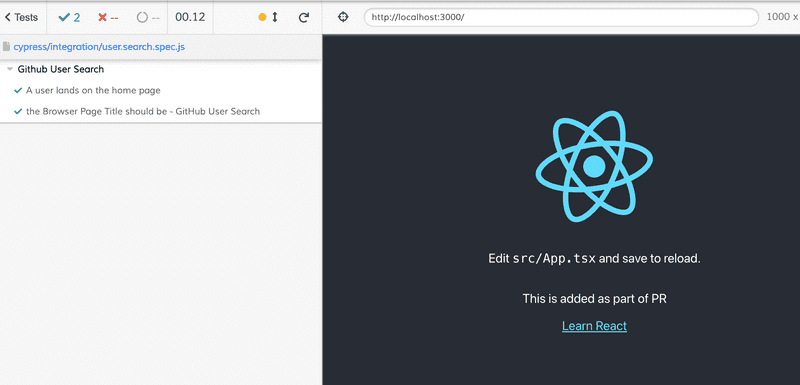
Now when we run E2E suite we should see failed tests (RED Phase)
Writing Failing Integration Tests
Next step is to write our failing integration tests
describe('Github User Search', () => {
  it('A user lands on the home page', () => {
    cy.visit('http://localhost:3000')
  })

  it('the Browser Page Title should be - GitHub User Search', () => {
    cy.title().should('eq', 'GitHub User Search')
  })
})
Why am I writing the same tests twice?
Some of you may wonder why am I writing the same tests twice?
Good question. We should remember that even though E2E and Integration tests may reside in the same code base, the functionality they test are very different.
Integration tests are for testing the system as a whole without leaving the system boundary. Which means all external interactions are mocked in an integration test (like API call)
E2E tests are for testing the whole software from an end user perspective. Which means we will actually test how the system interacts with external services.
The difference will become clearer when we will introduce API calls. So even though some tests may look similar they are meant for testing a different level of the test pyramid.
Adding Code to make tests pass
Releasing our changes
Now we have completed our first task for the story, lets leverage our CI/CD to push changes, so everyone can see our awesome work !!!
Raising a Merge Request
Merging our Merge Request
Changes immediately visible to all stakeholders
Congratulations you have released your first BDD scenario using TDD and automated CI/CD
Continuing with our stories, we will keep implementing each scenario and pushing our changes to master.
So the second scenario
Given that a user lands on the home page
Then the page Top Heading should be - GitHub User Search
And the tag should be h1
Looks like
Remaining Stories
Feature: Search Bar
Adding Search Bar for user input
Scenario 1: Should see default placeholder
Given that the user is on the landing page
When the user has NOT focused on the search input
Then the user must see the default placeholder - Type Username
Scenario 2: Should be able to type username in the search box
Given that the user is on the landing page
When the user has focused on the search input
Then the user must be able to type a username for search
Feature: Perform User Search
Searching for user using GitHub API
Scenario 1: Should perform search when user add search text and hits enter
Given that the user is on the landing page
When the user enters text in the search field and hits Enter key
Then the GitHub API should be called with the username
And the status should show as In Progress
Scenario 2: Should not search if the search text is empty
Given that user is on the landing page
When the user focuses on the search field and hits the Enter key WITHOUT adding any text
Then the GitHub API should NOT be called
Scenario 3: Should display search results count after search
Given that the user is on the landing page
And enters the username and hits Enter Key
When the GitHub API returns results
Then the Count of total results should be displayed as - X Results Found
Scenario 4: Should display 0 results if no results found
Given that the user is on the landing page
And enters the username and hits Enter Key
When the GitHub API returns NO results
Then the Count of total results should be displayed as - 0 Results Found
Scenario 5: Should display error message if search fails
Given that the user is on the landing page
And enters the username and hits Enter Key
When the GitHub API returns ERROR
Then the Count of total results should NOT be displayed
And Error Message - Failed to search User - should be displayed in RED
Feature: Display Search results from API
Displaying the actual results from the API
Scenario 1: Should display user image and user name per result row
Given that the user has initiated a search
When the GitHub API returns >0 Results
Then individual result must be displayed in a row
And it must contain the User Image
And the username
Scenario 2: Should not display anything if nothing is found
Given that the user has initiated a search
When the GitHub API returns 0 Results
Then NO Rows must be displayed
And must display message - No Results Found
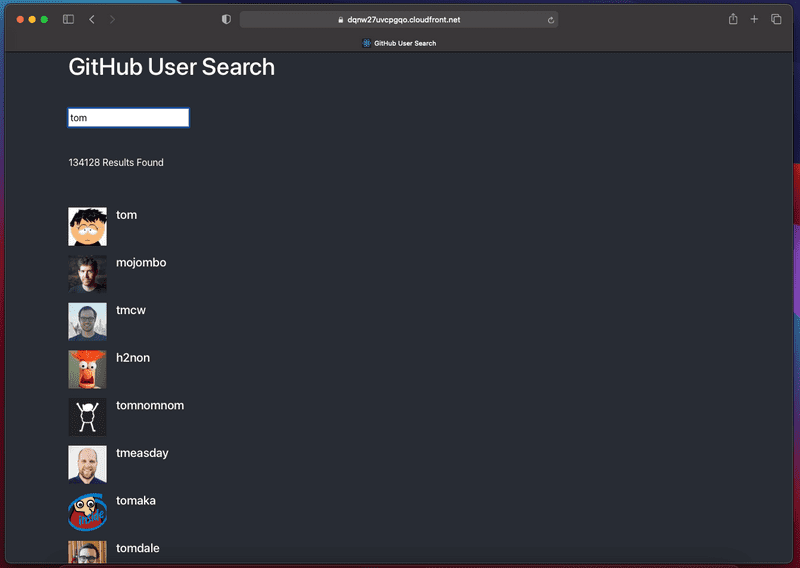
Final Output
Web App
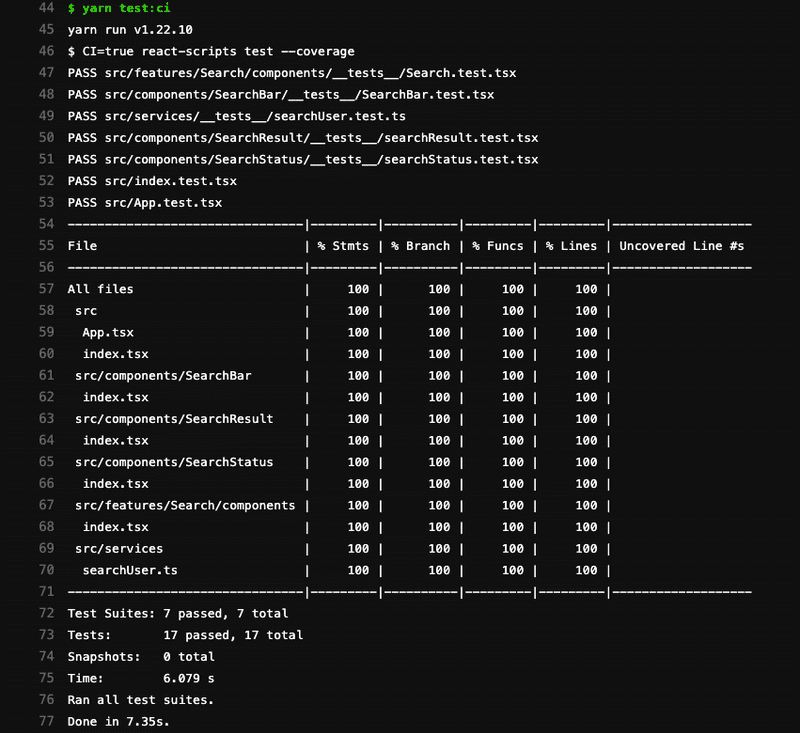
Unit Tests
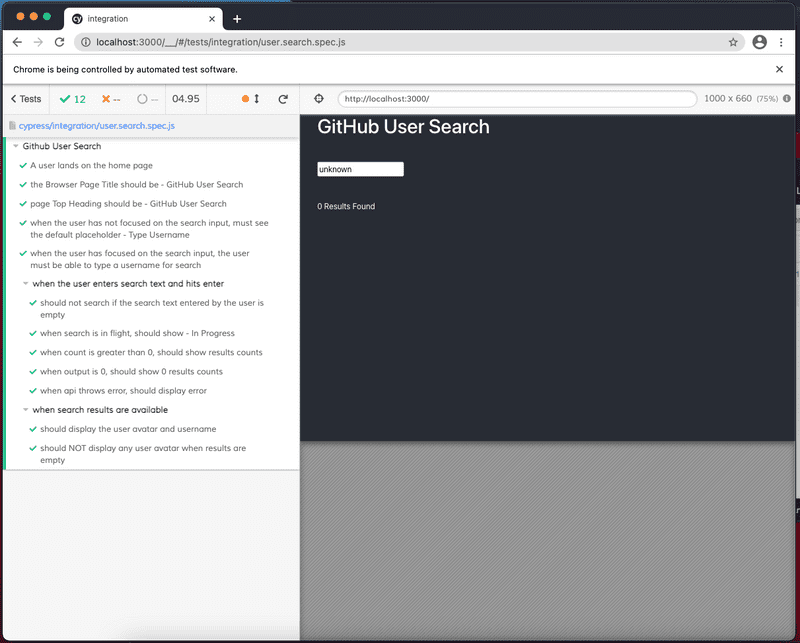
Integration Tests
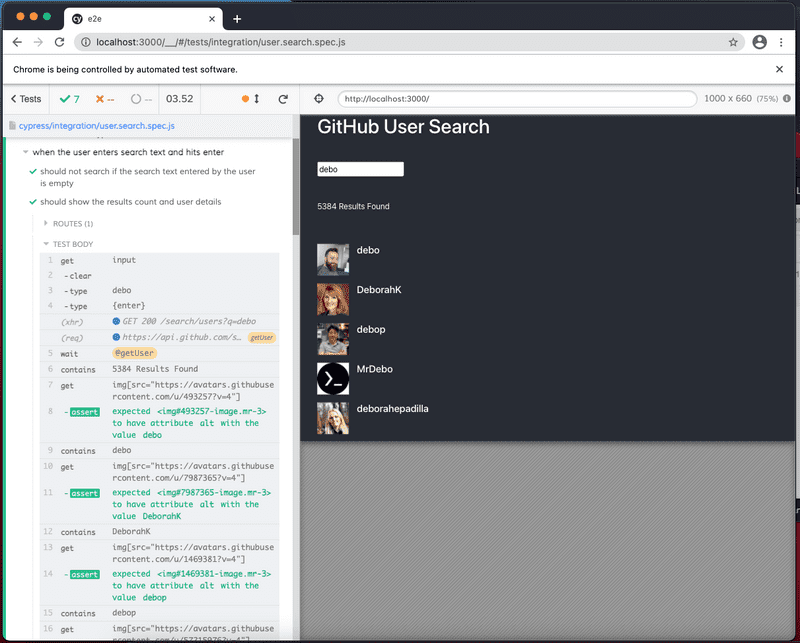
End-to-End Tests
Continuous Integration and Delivery Models
There are 2 ways of managing CI/CD
Developers only Team (No Dedicated QA Team)
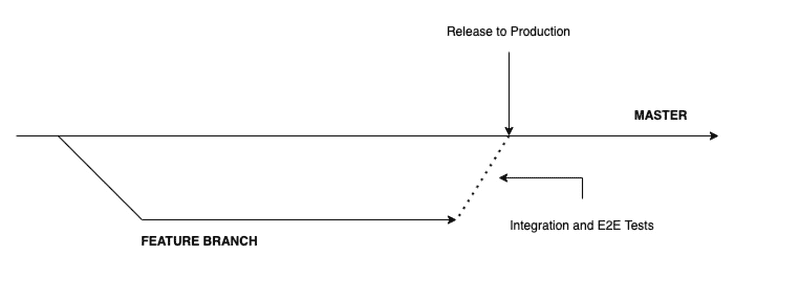
This one is similar to our example.
This is applicable to teams where developers are expected to manage E2E scenarios. There is NO dedicated QA team.
- One Master Branch for the product
- Every feature / scenario is worked on feature branch
- Developer adds Integration and E2E tests
- Every Merge Request runs the complete test suite (Unit, Integration and E2E Tests) which takes of Regression as well
- If Tests pass, on merge, Feature is released to Production
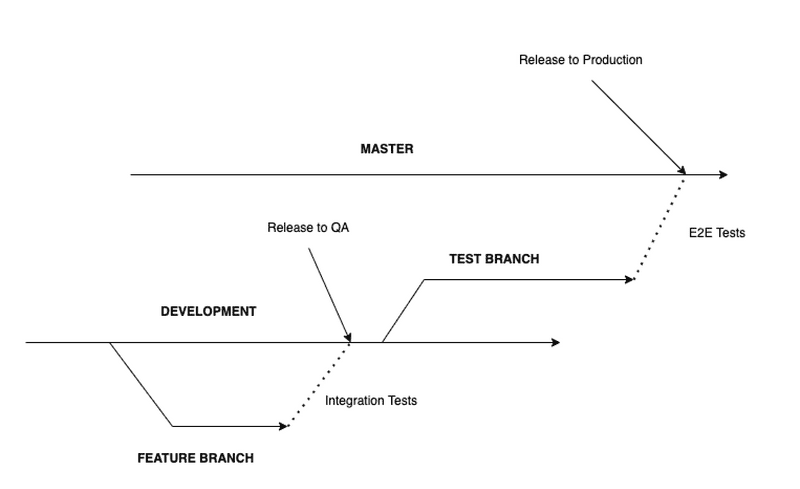
Developers and Dedicated QA Teams
When there is a dedicated QA Team / role , the process is a bit different.
Now we can offload the E2E tests to QA team. Developers are still responsible for Unit and Integration Tests.
- There are 2 main branches - Development and Master
- Development → QA Environment
- Master → Production
- Developer creates a Feature branch from Development
- Completes the feature and adds Integration and Unit tests
- On Merge to Development, All Integration, Unit and E2E tests are run.
- E2E tests are run on Development to test regression
- If Tests pass, on merge to Development, changes are released to QA Environment
- QA Team creates a Test Branch from Development
- QA team adds their E2E and Load Tests
- On Merge Request on Master, All E2E and Load Tests are run
- If Tests pass, On Merge to Master, changes are released to Production.
Hope this practical guide for Behaviour driven development (BDD) with Continuous Integration and Delivery (CI/CD) was helpful, and you can implement it in your next project.

